

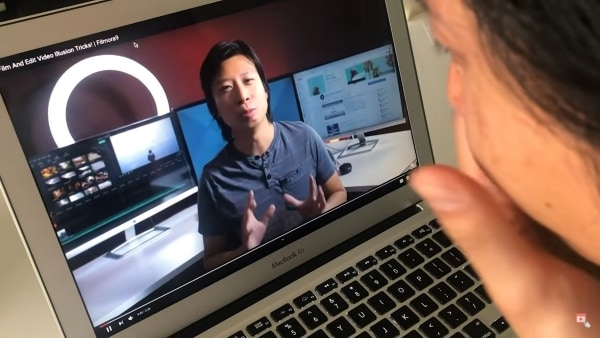
In today's fast-paced business environment, Zoom meetings are crucial for collaboration and communication. Recording these sessions serves various purposes, from social media marketing to training and documentation. With Audiotease, editing your Zoom recordings becomes a breeze. This cloud-based video editing software allows you to effortlessly trim, add backgrounds, subtitles, and merge recordings, ensuring your content is engaging and polished for future audiences.
1. Why Edit Zoom Recordings?
Editing Zoom recordings is essential for maximizing their impact and utility. With the surge in remote meetings, these recordings serve various purposes, such as showcasing company culture, facilitating knowledge transfer, and documenting processes for legal compliance. By refining these recordings, businesses can create valuable resources that enhance training, marketing strategies, and future brainstorming sessions.
Moreover, editing can significantly improve the viewer experience. By shortening recordings for easier consumption and customizing content for different platforms, organizations can engage their audience more effectively. Enhancements like improved sound quality, added subtitles, and the removal of sensitive content ensure that the final product is polished and professional, making it suitable for a wider range of applications.
2. Recording Options: Local vs. Cloud
Zoom provides users with two primary recording options: Local and Cloud recording. Local recording is accessible to both free and paid subscribers, allowing hosts to enable or disable it in the Account Settings. Participants can also be granted permission to record locally, enhancing collaboration.
However, local recordings come with limitations. They cannot be made from mobile devices and always display a thumbnail gallery view. Additionally, these recordings do not include timestamps or participants' names, which may hinder the ability to reference specific moments or contributions during the meeting.
On the other hand, Cloud recording is exclusively available to paid subscribers and is automatically enabled for them. Hosts or co-hosts can initiate cloud recording by simply clicking the record button during a meeting. This option also supports recording on iOS and Android devices, making it more versatile for users on the go.
Cloud recordings offer the convenience of streaming video, audio, and chat text directly to the Zoom cloud. Users can download these files to their computers or access them via a browser. However, cloud storage is limited to 1 GB per licensed user, necessitating the management of older recordings to maintain sufficient space for new ones.
3. Troubleshooting Recording Issues
```html
Recording issues in Zoom can be frustrating, especially when local recordings fail to convert or save properly after a meeting. To mitigate these problems, it's essential to ensure that your computer has enough disk space available. Insufficient storage can lead to incomplete recordings, leaving you without valuable content from your sessions.
Another common cause of recording failures is an invalid folder path for the recording location in the Zoom client. If the designated folder is inaccessible or has been moved, the recordings may not save correctly. Additionally, it's crucial to avoid renaming the double_click_to_convert.zoom files or shutting down your laptop during the conversion process, as these actions can disrupt the saving of your recordings.
Lastly, patience is key when dealing with longer meetings, as the conversion process can take time. Rushing through or interrupting this process may result in lost recordings. By being mindful of these factors, you can significantly reduce the likelihood of encountering recording issues in Zoom and ensure that your meetings are captured successfully.
```
4. Getting Started with Audiotease
Getting started with Audiotease is a straightforward process that begins with logging into your account. If you’re new, you can easily sign up for a free trial by providing your email and creating a password. Once logged in, you’ll find yourself on the dashboard, ready to create and edit your Zoom recordings.
After creating a blank video, you can upload your Zoom recording by clicking the upload icon or dragging the file directly onto the screen. Audiotease offers various editing options, including:
- trimming
- adding backgrounds
- inserting subtitles
Once you’re satisfied with your edits, simply export your video in your desired format and resolution, ensuring it’s saved for future access.
5. Trimming Your Zoom Recording
Trimming your Zoom recording is a straightforward process that allows for precise editing. By adjusting the timeline bar, you can easily remove unwanted sections from the beginning or end of your video. Additionally, selecting specific portions in the middle enables further refinement, ensuring a polished final product.
6. Adding Backgrounds for Consistency
Incorporating a consistent background into your Zoom video recordings can significantly enhance the overall professionalism of your presentations. By selecting a common image background, you create a cohesive visual experience that helps to maintain viewer engagement. This approach not only reinforces your brand identity but also minimizes distractions during your video calls.
To implement this, you can choose from a variety of template photos or upload a custom image that aligns with your theme. Once the image is set as the background, it will seamlessly fill your dashboard screen, providing a polished backdrop for your video content. This simple adjustment can make a substantial difference in how your audience perceives your message.
- Select a common image background for a cohesive look.
- Choose from template photos or upload your own image.
- Ensure the image fills the entire dashboard screen.
- Position the image behind your video feed for visibility.
- Maintain a professional appearance throughout your recordings.
7. Incorporating Subtitles and Text
Incorporating subtitles and text into your videos enhances accessibility and engagement, catering to viewers who prefer mute browsing. By adding subtitles, you ensure that your content is understandable even without sound, making it more inclusive for a wider audience. This feature is particularly beneficial for those watching in public spaces or during quiet moments.
Additionally, integrating text into your recordings can help clarify or emphasize key points during a meeting. By strategically placing text overlays, you can guide viewers' attention and reinforce important messages. This not only improves comprehension but also keeps the audience engaged, as they can visually follow along with the discussion while the video plays.
8. Merging Multiple Zoom Recordings
Merging multiple Zoom recordings allows you to create a cohesive video by integrating additional clips, whether for humor or further explanations. This feature is particularly useful for combining two-part meetings into a single, seamless presentation. With tools like Audiotease, you can easily trim and arrange your recordings, enhancing your final video with images and text for a polished result.
In conclusion, effortlessly editing your Zoom recordings with Audiotease can greatly improve their quality and impact. The platform allows you to trim videos, add backgrounds, subtitles, and text, and merge recordings seamlessly. With an intuitive interface, you can create polished content for training or marketing, and easily export your videos in any format and resolution for sharing or storage.